2021-11-29
1. ATtiny85
Relevant features:
-
Two timers, slightly different capabilities
-
5 available GPIO pins
-
Analog comparator
-
V_Px > V_Pydigital output -
Certain input combinations possible
-
-
ADC - 10-bit resolution
-
Some limitations, example: §17.5 Prescaler and Conversion Timing
-
-
Easily programmable "bare" using §20.5 Serial Downloading
-
Use an Arduino Nano as the programmer
-
2. Turning a Nano into an ISP programmer
-
ISP: In-System Programming
Resources:
2.1. Overview
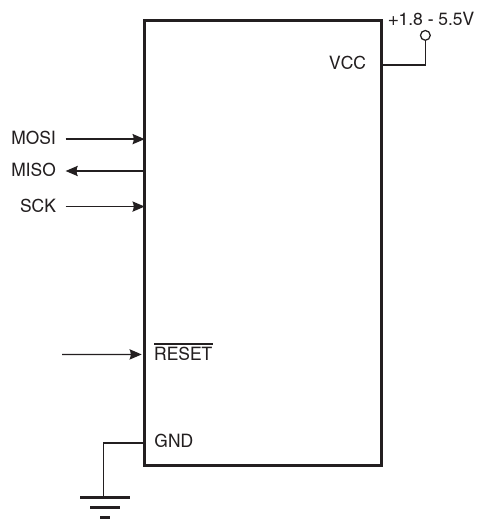
Datasheet §20.5:
Both the Flash and EEPROM memory arrays can be programmed using the serial SPI bus while /RESET is pulled to GND.
2.2. ArduinoISP sketch
In the Arduino IDE: File -> Examples -> ArduinoISP
Take a few minutes to scan the comments in this sketch.
After configuring clocks, pins, and options, the code:
-
Speaks the STK500 Communication Protocol with the PC using the UART port.
-
Implements the Datasheet’s Serial Programming Algorithm (section §20.5.1, page 151)
3. hw11 - ATinyGate
Implement the specification of Project 1 on your ATtiny85 MCU.
-
Your
app.{c,h}must be the same file as your Project 1 -
Therefore, you will need to write a third "board support package" for this new MCU.
The due date is set as Friday, but you should target finishing this by Wednesday if possible.
Use the above resources to program your target.
-
Set up a breadboard with your Nano to act as a programmer.
-
Set up a second breadboard (or separate section) to hold the circuitry for your application hardware. (buttons for inputs and a (resistor +) LED as output?)